
Formulas and functions are usually created using references to other cells on the spreadsheet. Where you need to refer to a fixed cell and still be able to duplicate the formula around the spreadsheet then you can use fixed cell references as explained in the Simple Formulas and Functions reference guide.
These absolute and mixed cell references can sometimes make the formulas difficult to read, especially when you get into creating the likes of VLOOKUP and SUMIFS formulas. Therefore we can name cells and ranges or set a value to a name for use in formulas to avoid this.
There are multiple approaches to naming cells. First you need to know where to see the names you create. All cells in Excel have a default name – their cell reference, which is displayed in the Name Box. The Name Box is located next to the formula bar underneath the ribbon.

To name a cell or range using the Name Box:
- Select the cell or range to be named
- Click into the Name Box
- Type in the desired name This name can be made up of a combination of letters, numbers, full stops or underscores. It cannot be the same as cell references and can’t include spaces. It must be less than 255 characters in length and is case sensitive
- Press Enter key on keyboard
To name a cell or range using the ribbon:
- Select the cell or range to be named
- On the Formula tab, in the Defined Names group click the Define Name button

- In the New Name dialog box type in the desired name into the Name field
- If required add a comment
- Click OK
 If you have set out a table in your spreadsheet with titles at the start of each column and row within the table then you can use these titles to create named ranges.
To name cells based on table headings:
- Select the table containing the cells to be named
- On the Formula tab, in the Defined Names group click the Create from Selection button

- In the Create Names from Selection dialog box, choose the options which indicate where the names to be used are
- Click OK
 Names need to be unique within a spreadsheet file (workbook) and as such can be used to navigate through the workbook.
To navigate to a cell or range using its name:
- Click on the arrow head in the Name Box
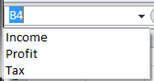
- Choose the desired name
Names can also be used for fixed values which you do not want to display on the worksheet.
To create a named value:
- On the Formula tab, in the Defined Names group click the Define Name button

- In the New Name dialog box type in the desired name into the Name field
- If required add a comment
- In the Refers to box enter the value or formula for the named value
- Click OK
You can use the name of named cells, ranges or values in any formula in place of a cell reference via the button, on the Formula tab, in the Defined Names group.
