
THIS BLOG POST WAS WRITTEN BY COPILOT AS PART OF AN EXPERIMENT WITH COPILOT NOTEBOOKS. It has not been modified, bar adding this disclaimer, the additional comments at the end and the images. To read about the experiment visit https://copilotqueen.com/2025/07/11/a-copilot-notebook-experiment/ If you are interested in how to export your mailbox to PST, please read the addtional comments.
If you’ve recently switched to the new Outlook for Windows, you might have noticed a sleek new interface and a growing list of modern features. One of the most exciting additions? You can now export your mailbox to a PST file—a feature that was previously only available in classic Outlook.
Whether you’re backing up important emails, preparing for a role change, or just like having a copy of your data, this new feature makes it easier than ever.
Why This Matters
In the past, exporting your mailbox meant switching back to the classic Outlook app or relying on IT support. Now, with this feature rolling out (Microsoft 365 Roadmap ID: 485737), you can do it yourself—right from the new Outlook interface.
This is especially helpful for:
- Trainers and educators archiving course communications
- Professionals preparing for audits or certifications
- Anyone who wants a personal backup of their email history
Step-by-Step: Exporting Your Mailbox
Here’s how to export your mailbox to a PST file using the new Outlook for Windows:
1. Open the New Outlook
Make sure you’re using the new version. If you’re unsure, look for the toggle in the top-right corner of classic Outlook that says “Try the new Outlook.”
2. Go to Settings
- Click the gear icon in the top-right corner.
- Scroll down and select Mail > Accounts > Export Mailbox.

3. Choose What to Export
- You can export your entire mailbox or just specific folders like Inbox, Sent Items, or custom folders.
- Some versions may let you filter by date range or item type (e.g., emails only, calendar items, etc.).
4. Start the Export
- Click Export.
- Outlook will begin preparing your PST file. This may take a few minutes depending on the size of your mailbox.
5. Download the File
- Once ready, you’ll receive a download link or the file will be saved to your Downloads folder.
- Save it somewhere secure—especially if it contains sensitive or personal data.
A Quick Word on Security
Exporting your mailbox is powerful—but with great power comes great responsibility:
- Encrypt your PST file if it contains confidential information.
- Store it securely, ideally on a cloud drive with versioning or a secure external drive.
- Follow your organization’s data policies—especially if you’re handling client or student data.
Real-World Use Cases
Here are a few ways this feature can support your work:
- Training & Coaching: Archive feedback and session notes for future reference.
- Certification Prep: Keep a record of all cert-related communications.
- AI Course Development: Back up conversations and resources shared during course creation.
Final Thoughts
The ability to export your mailbox in the new Outlook for Windows is a small change with big impact. It puts control back in your hands—whether you’re a trainer, a course creator, or just someone who likes to stay organized.
So go ahead—give it a try. And if you’re helping others learn this feature, feel free to share this guide!
Sara’s Additional Comments
I can’t leave this article without adding a little bit of clarification on the process which Copilot missed or got wrong as I know some of you are reading this article for the actual content not the Copilot experiment.
- Step 1: This is only New Outlook on Windows
- Step 2: Settings > Files > Export
- Step 3:
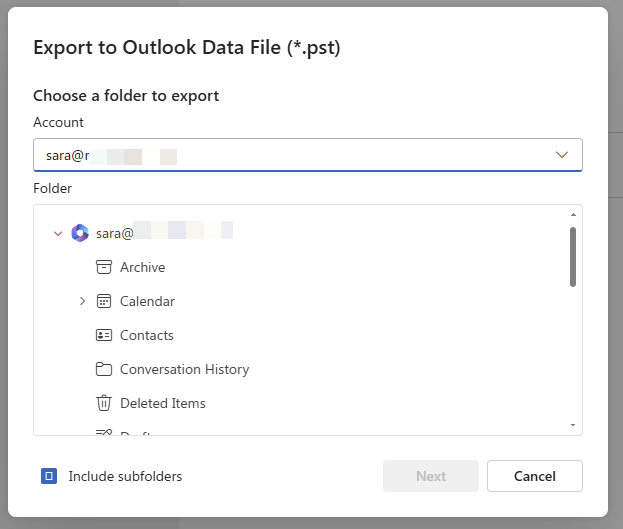
- Click Get Started then select mailbox and folders then click Next
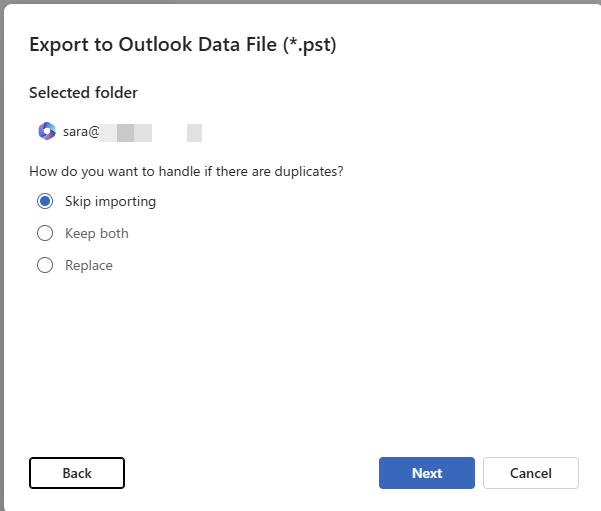
- Choose how to handle any duplicates items incl any which may already be in the pst file you choose, click Next
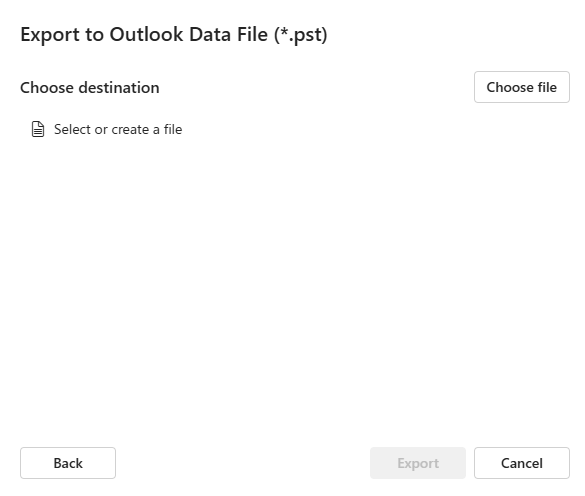
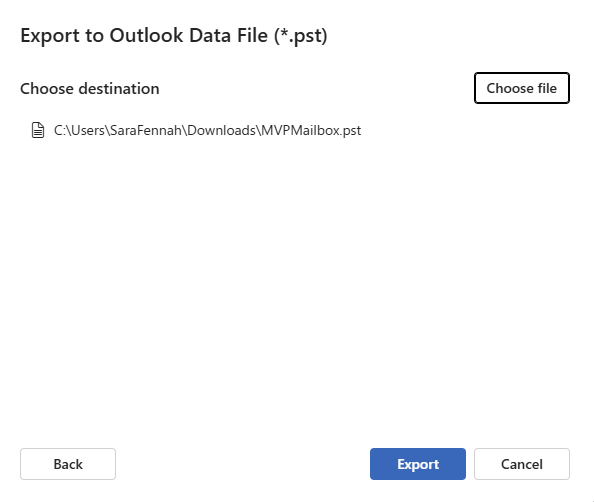
- Click Choose file button to navigate to folder where the pst file is or will be. If using an exisitng file, select the file. If creating a new file, input the file name into the file name box. Click Next
- For exisitng files you will need to enter the file password and for new files create a password. You can leave the password box blank and click OK to not set a password on the file.
- Click Export
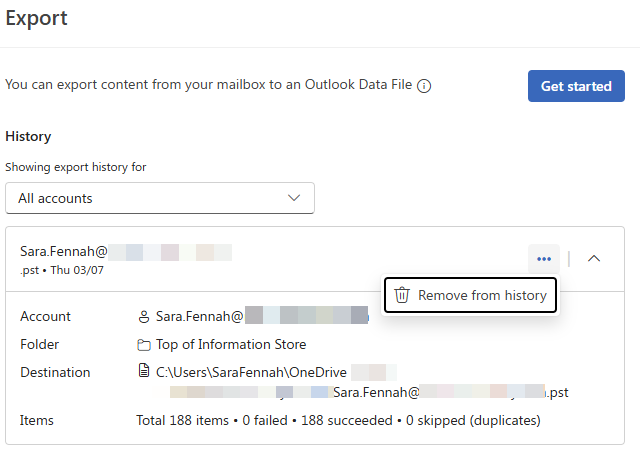
Once your export is complete you can see the details of the items exported the history section of the dialog box. As you choose where to store the file in step 3 there is not need to download the file as indicated in Step 5 of Copilot’s instructions.

One thought on “How to Export Your Mailbox to a PST File in the New Outlook for Windows”