Personal bookings for Microsoft Outlook can be used to allow people to make bookings in your diary. This builds on the functionality of Microsoft Bookings but instead of being controlled by an administrator, personal bookings are managed by the individual user and relate to just their calendar. As with the company Booking functionality, personal bookings provides a way for people to book an appointment in available slots in your diary.
To get the most of personal bookings, individuals do need to ensure the keep their personal calendar up to date and ensure they book out time to focus on tasks and other time slots when they are not available for bookings during bookable hours, such as travel time, leave or personal commitments.
Another top tip before we get into the details, is to always check your booking page as a booker to make sure it is behaving the way you wish. A private/incognito browser window is a great way to see what other will see when they are using your booking page.
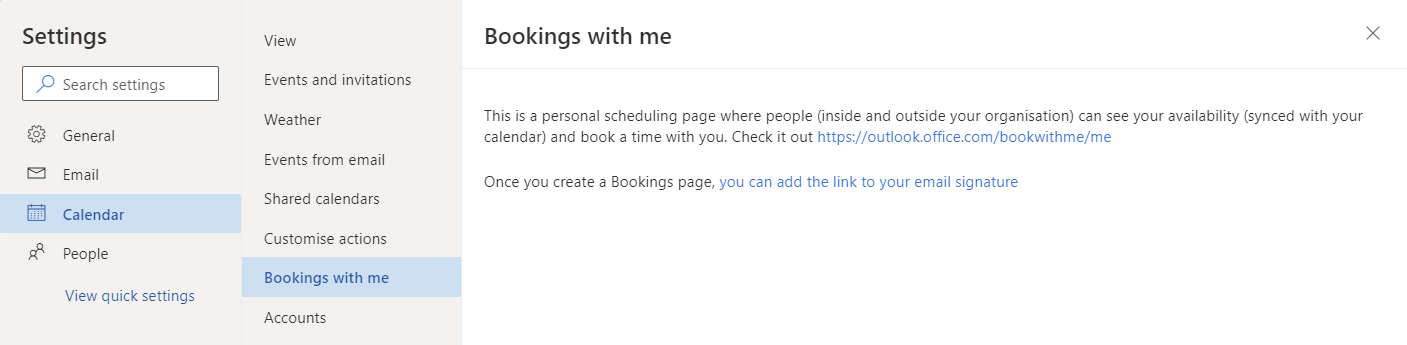
You access personal bookings via https://outlook.office.com/bookwithme/me
You can also access this link from Calendar settings in Outlook for Web where you will find a Bookings with me tab that has the link to personal bookings and also to add your bookings page to your email signature.
You may also be interested in reading about Microsoft Scheduler and also Find Time. You can find out more about Microsoft Bookings generally from Microsoft Docs and the personal bookings functionality documentation is also available on Microsoft Docs.
NOTE: The Microsoft 365 Administrator may need to enable bookings for your account. Details are available in the guidance on Microsoft Docs.
Accessibility note: The images do not have alt text on them, nor captions as the descriptions have been embedded into the article.
Getting Started – A Walk Through
When you first access the URL, you will see the setting up page.
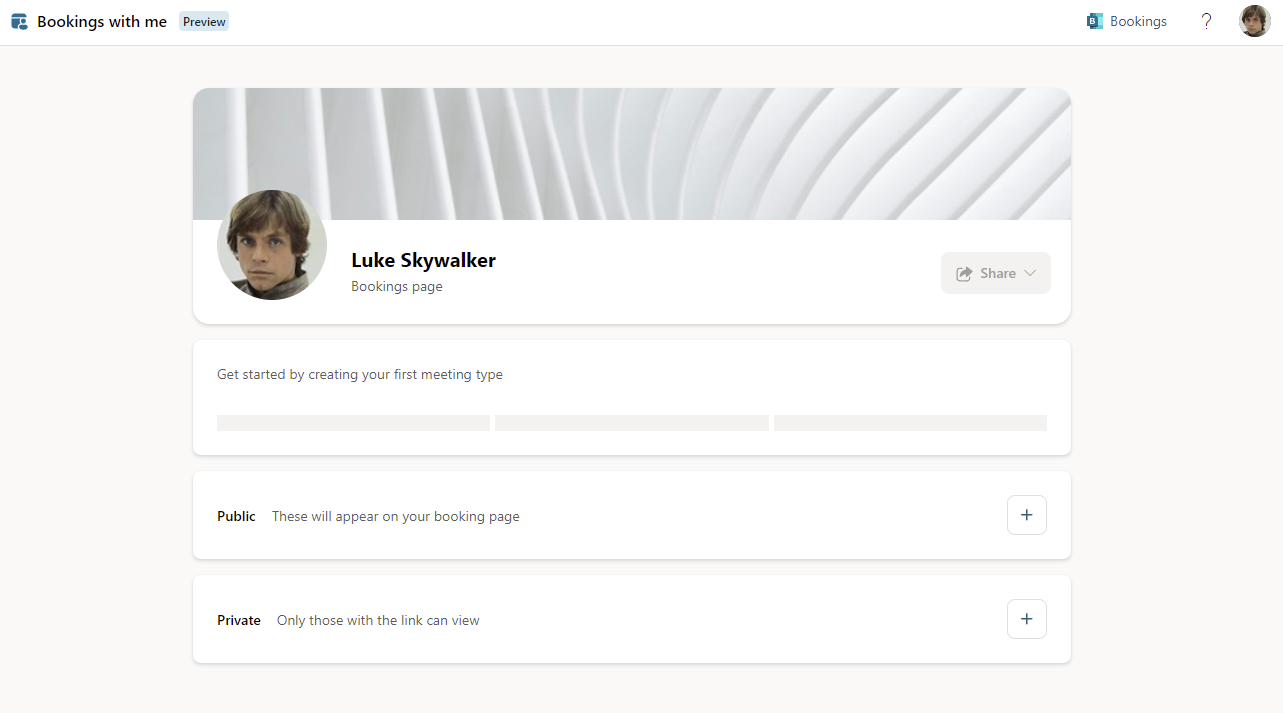
You’d be forgiven for thinking it’s not yet ready to go, but simply add a meeting type that people can book with you and you will be up and running. Meetings can be Public where the type of meeting will appear on your personal bookings page for anyone, or Private where they have their own specific link you can send people.
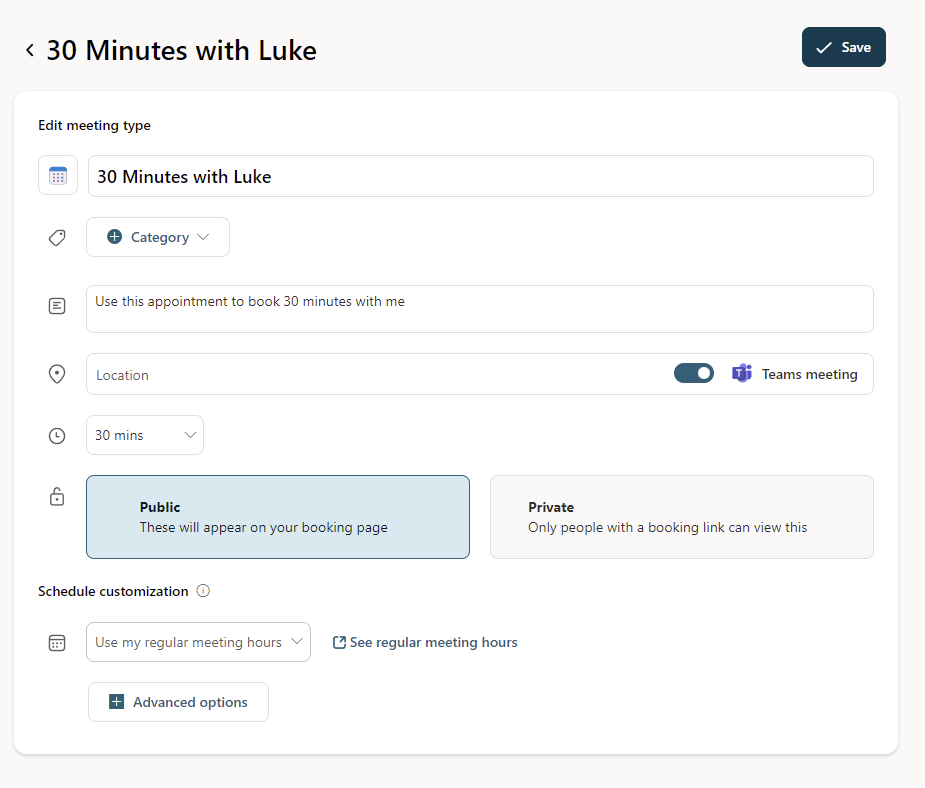
In this walk through, I’ll create a 30 minute public meeting.
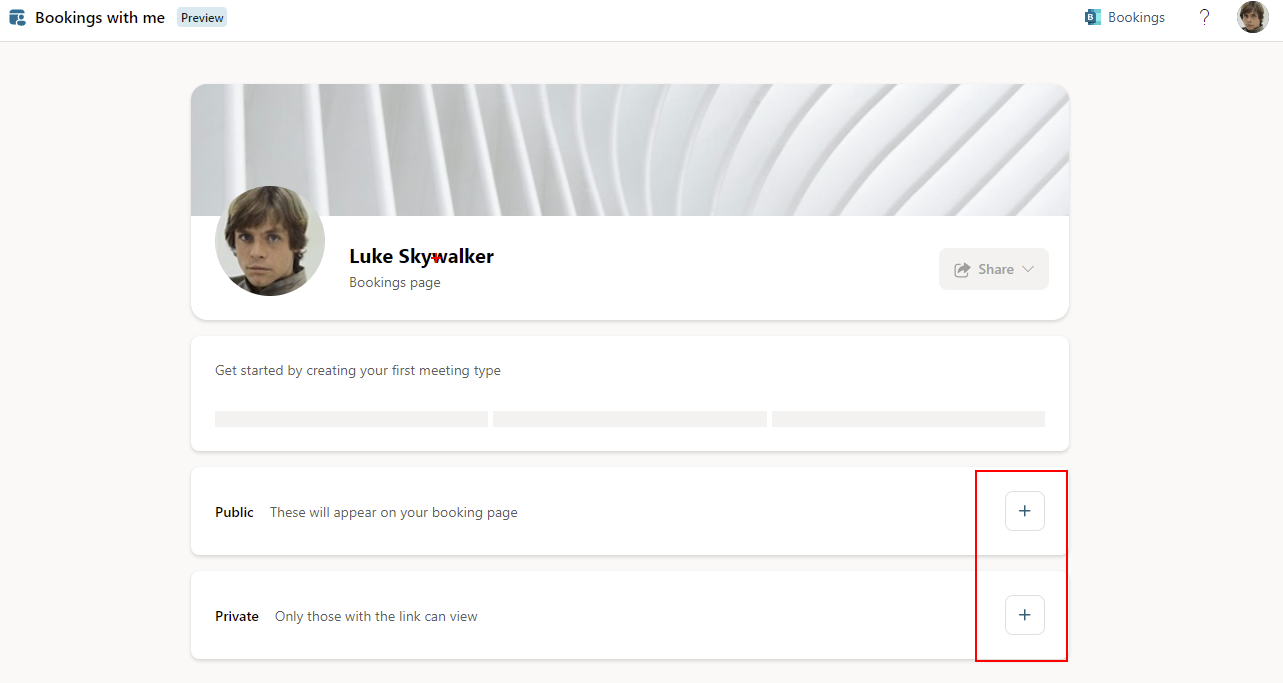
Start by selecting the + on the public meeting type and then enter the details including:
- Title – The appointment generated from the booking will be titled Booker Name – Meeting Title
- Category – select a colour category from your calendar categories to assign to the booking
- Description – describe the meeting type for those making the booking with you
- Location – Add a physical location and/or switch on automatically generating a Teams meeting for this booking
- Duration – pick meeting duration from the options or pick Customised to set a different duration
- Privacy – Choose Public for the meeting type to appear on your booking page or Private for the meeting type to be hidden on your page and only available to those you send the direct link to
- Schedule Customisation – choose to use your regular working hours from your Outlook calendar or create a custom schedule for this appointment type
- Advanced options – Set buffer time around the meeting to give a gap between booking and any other events in your diary, as well as minimum notice needed for a booking and the maximum time into the future a booking can be made.
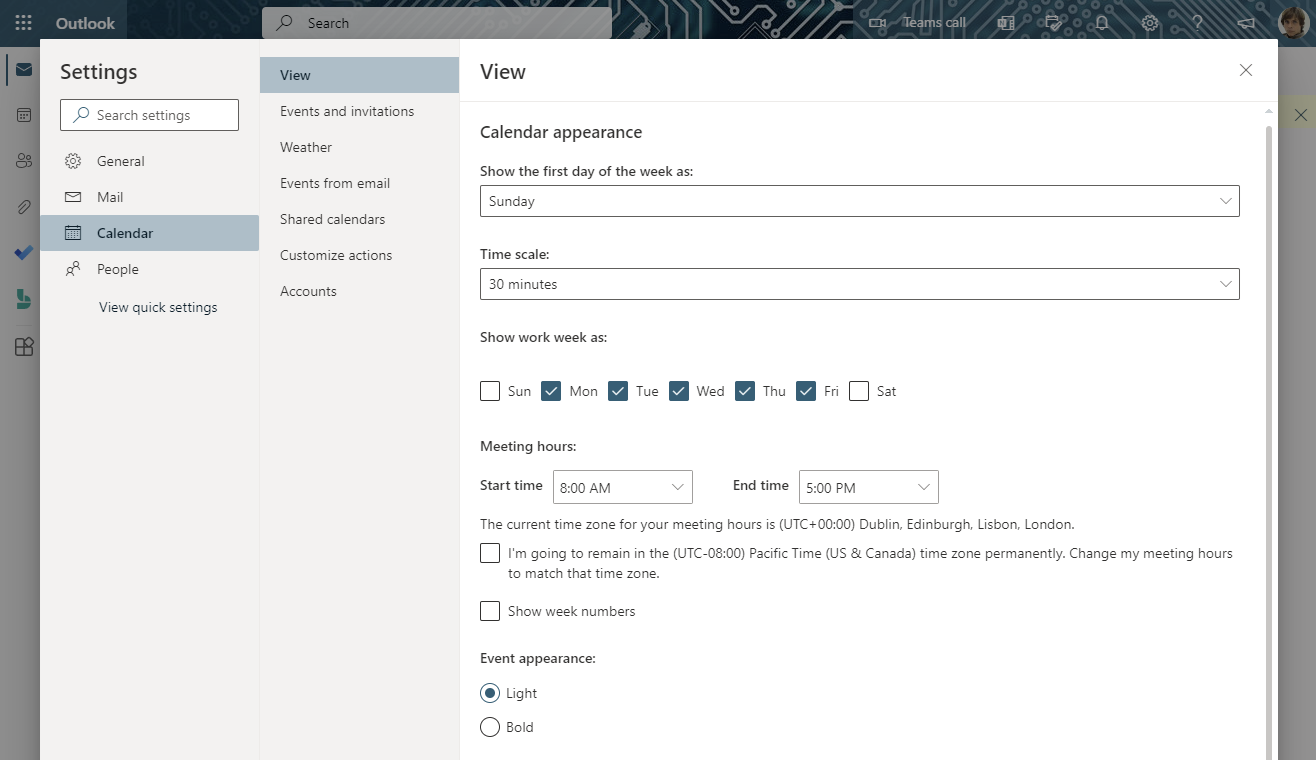
If you choose to use your regular meeting hours, you can follow the link to See regular meeting hours to check and edit your working hours in your Outlook calendar.
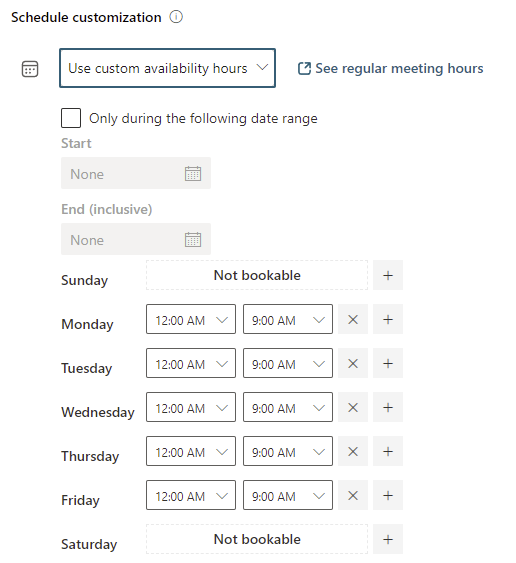
Or choose Use custom availability hours from the Schedule customisation options to configure working hours for this appointment type.

Custom hours lets you set schedule options specific to this meeting type.
- Only during the following date range makes this meeting type available only in a fixed date range, for example during a specific campaign or project. If this is not selected the meeting type is always available.
- Availability times can be set by customising the start and finish times on each day. Use the + button to add a time range to a day and the X button to remove a time range. Remember you can have multiple slots on a single day to protect breaks and days without available booking slots.
The Advanced options provide:
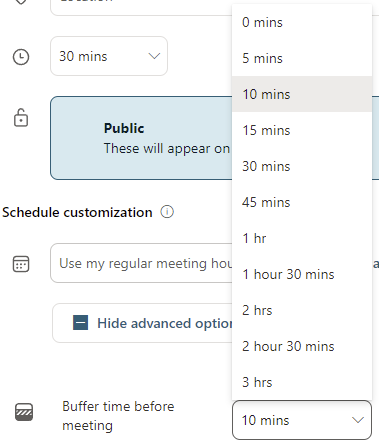
- Buffer time options to ensure a gap between the booking and other items in your calendar. Personally, I recommend a minimum of 10 minutes to ensure you have time to transition from one meeting to another.
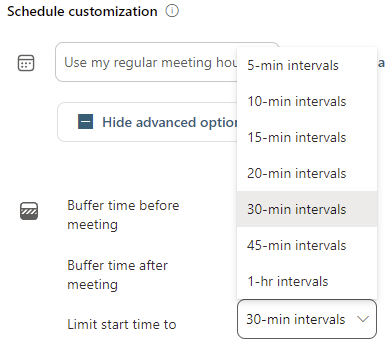
- Limit start time option, sets the intervals offered. The shorter intervals will provide more options for those making bookings. For example at 30 minute intervals start times on the hour and half hour only will be offered, whilst 5 min intervals will offer on the hour, 5 past, 10 past etc.
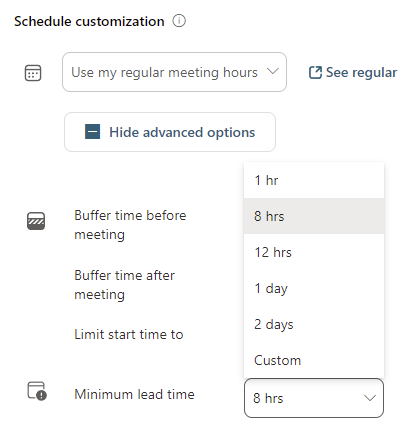
- Minimum lead time restricts the earliest time slot offered to those booking to give you some advance notice. I recommend setting this to an absolute minimum of 1 hour to allow time for email notifications of the booking to be sent and received
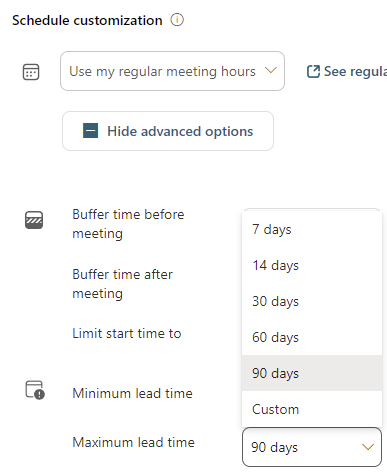
- Maximum lead time restricts how far into the future bookings can be made.
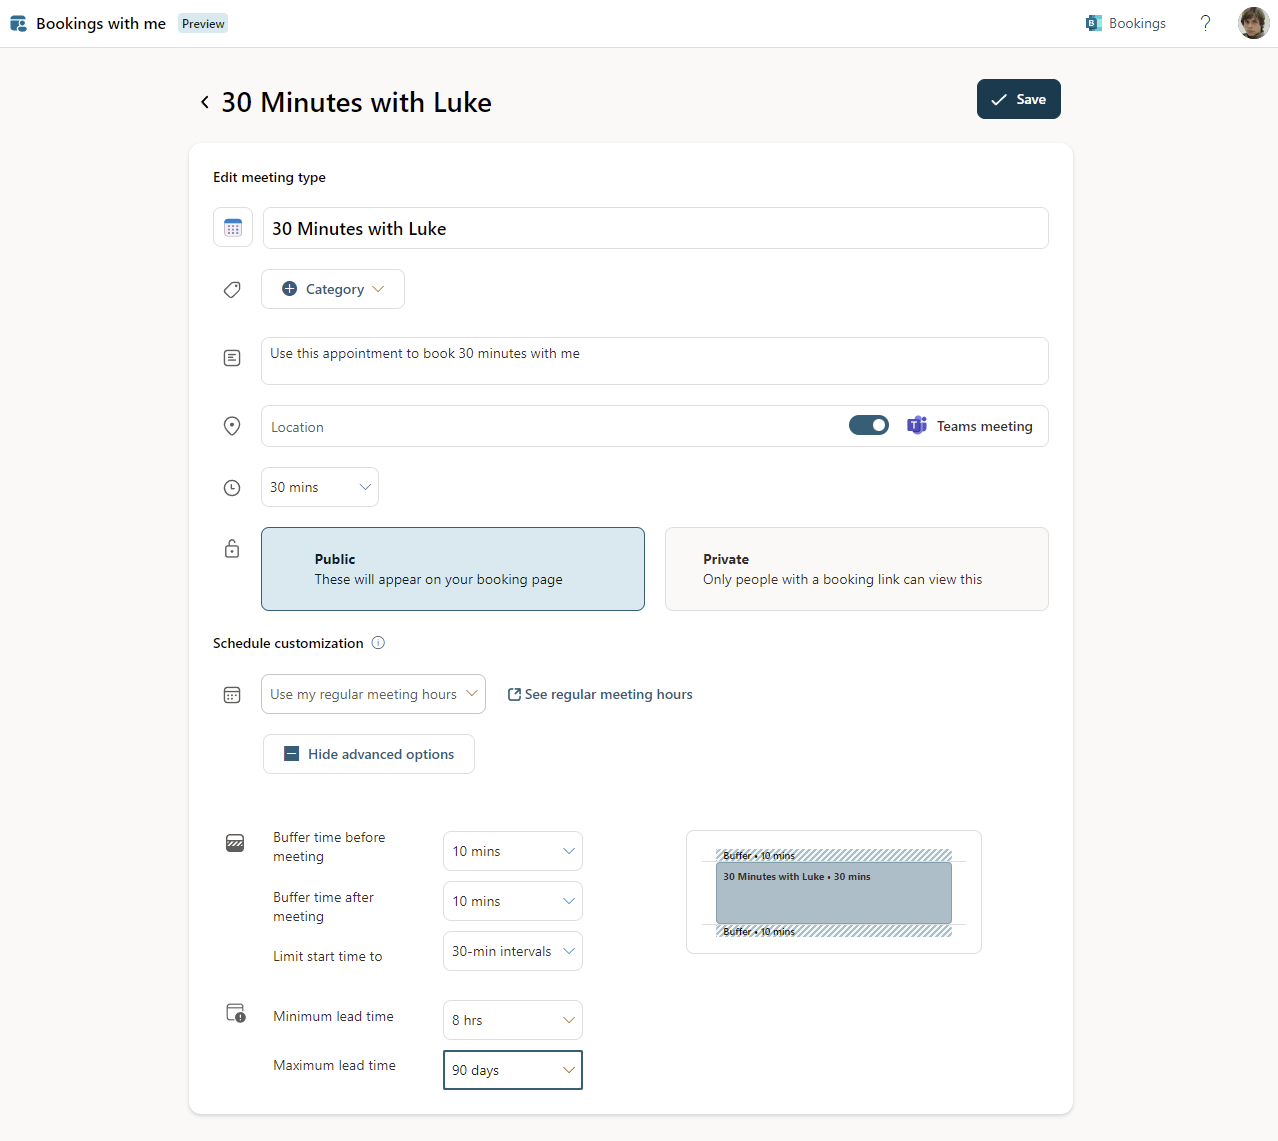
Buffer time options range from 0 minutes up to 3 hours
Available start time intervals range from 5 minutes up to 1 hour.
Minimum lead time options range from 1 hour to 2 days plus an option set customised lead time in hours or days.
Maximum lead time options range from 7 to 90days plus an option set customised lead time in days. There must be a gap of at least 24 hours between minimum and maximum lead times.
Once you save your meeting type your booking page will be generated. This can take a little time. Whilst it is processing your https://outlook.office.com/bookwithme/me page will display the progress and the Share button will be greyed out. You do not need to keep the page open during this time.
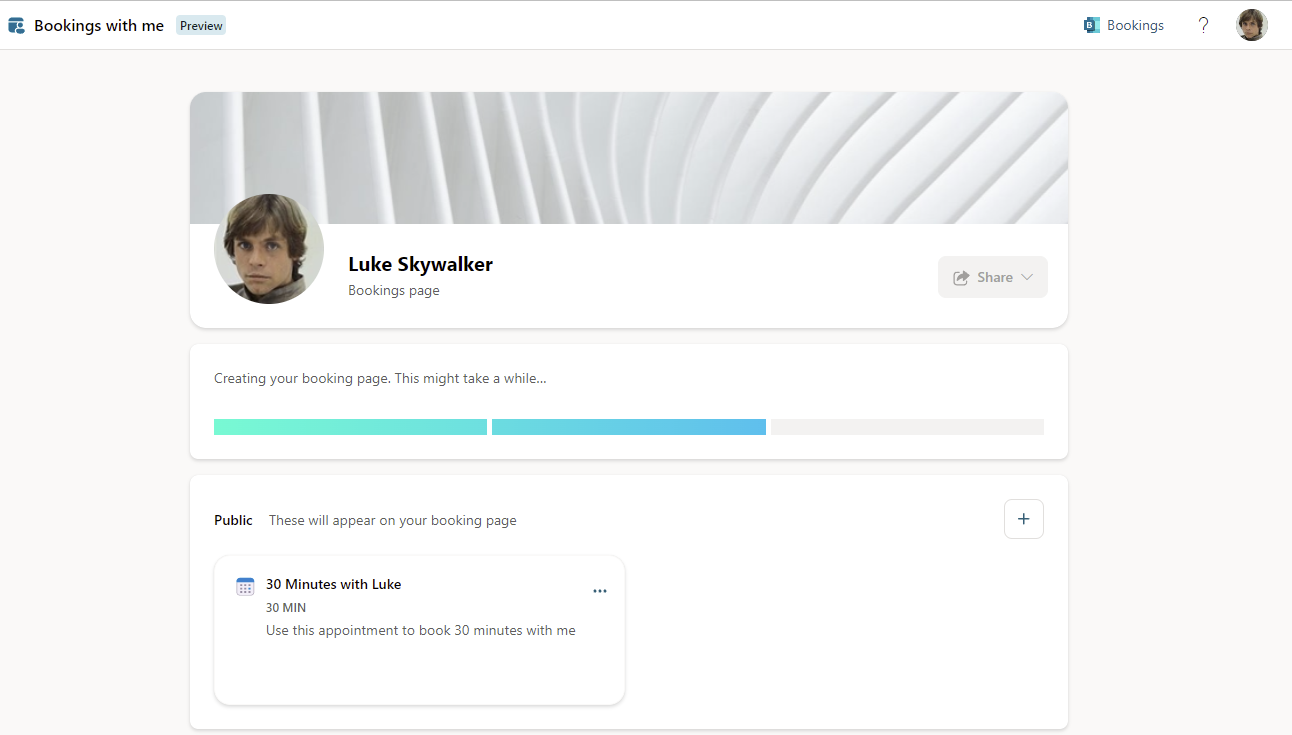
Once your bookings page has been created the Share button will become active.

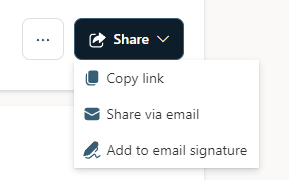
The Share button offers the option to copy the link to your bookings page, send an email to send with a link to your bookings page included or create/edit email signatures by adding a link to your bookings page.
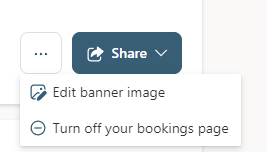
Next to the Share button in a … menu which offers the ability to pick a banner image or turn off your personal bookings page.
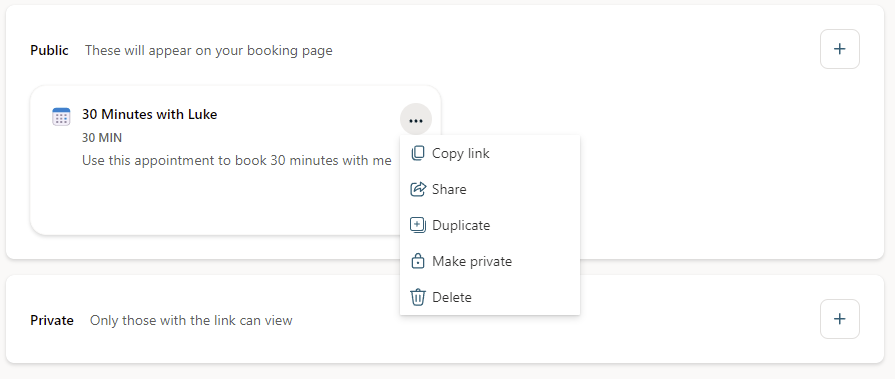
If you wish to share just a meeting type, each meeting type has its own … menu with the option to copy the link or share the meeting. From here you can also duplicate a meeting type, change the privacy setting or delete the meeting type. Note that private meeting types also have a single use sharing link option.
Making a Booking
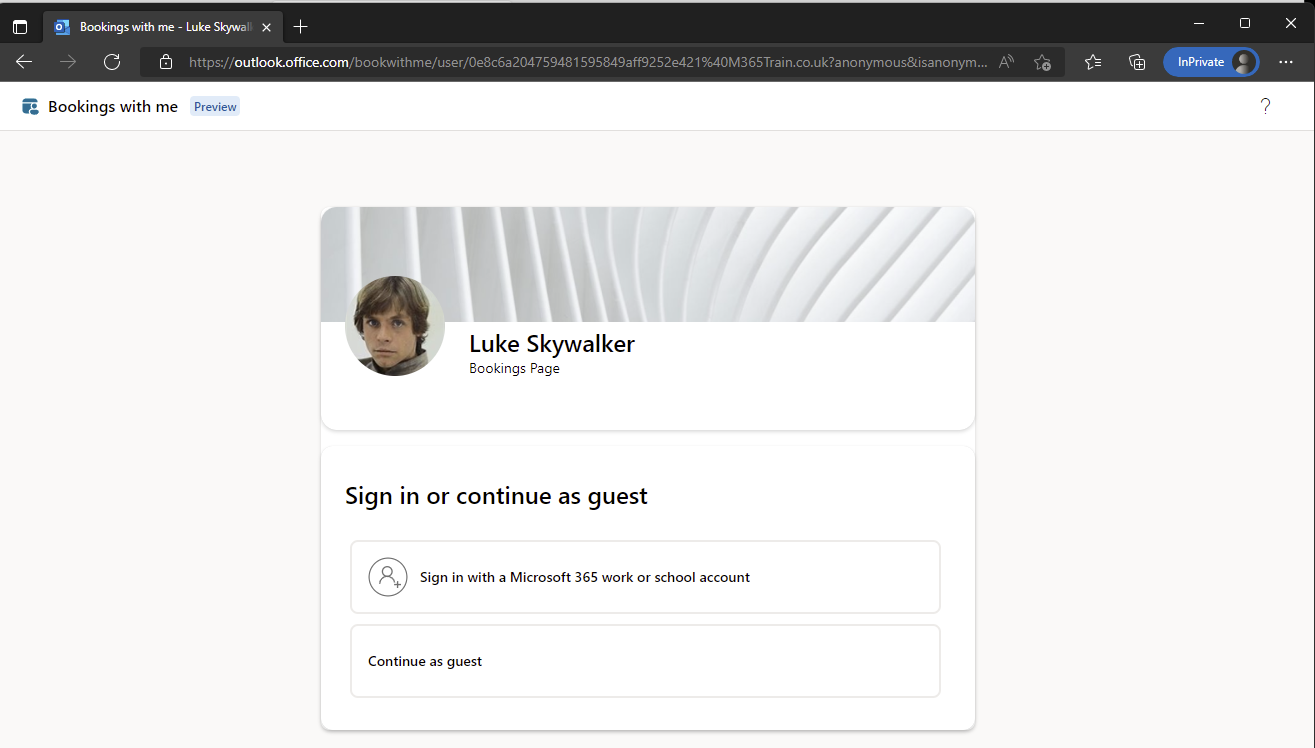
On visiting someone’s bookings page to make a booking you have the option to sign in with Microsoft 365 work or school account (i.e. not a personal Microsoft account) or continue as a guest. If you sign in, your own calendar timezone and availability is taken into account in the booking process. But first let’s walk through the process as a guest.
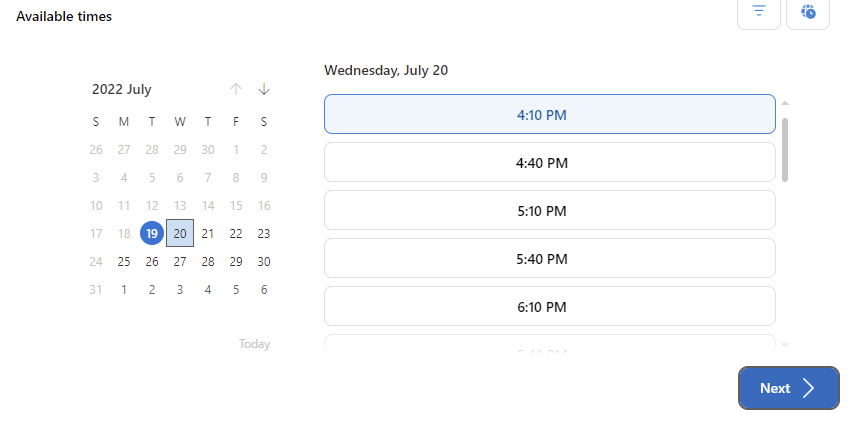
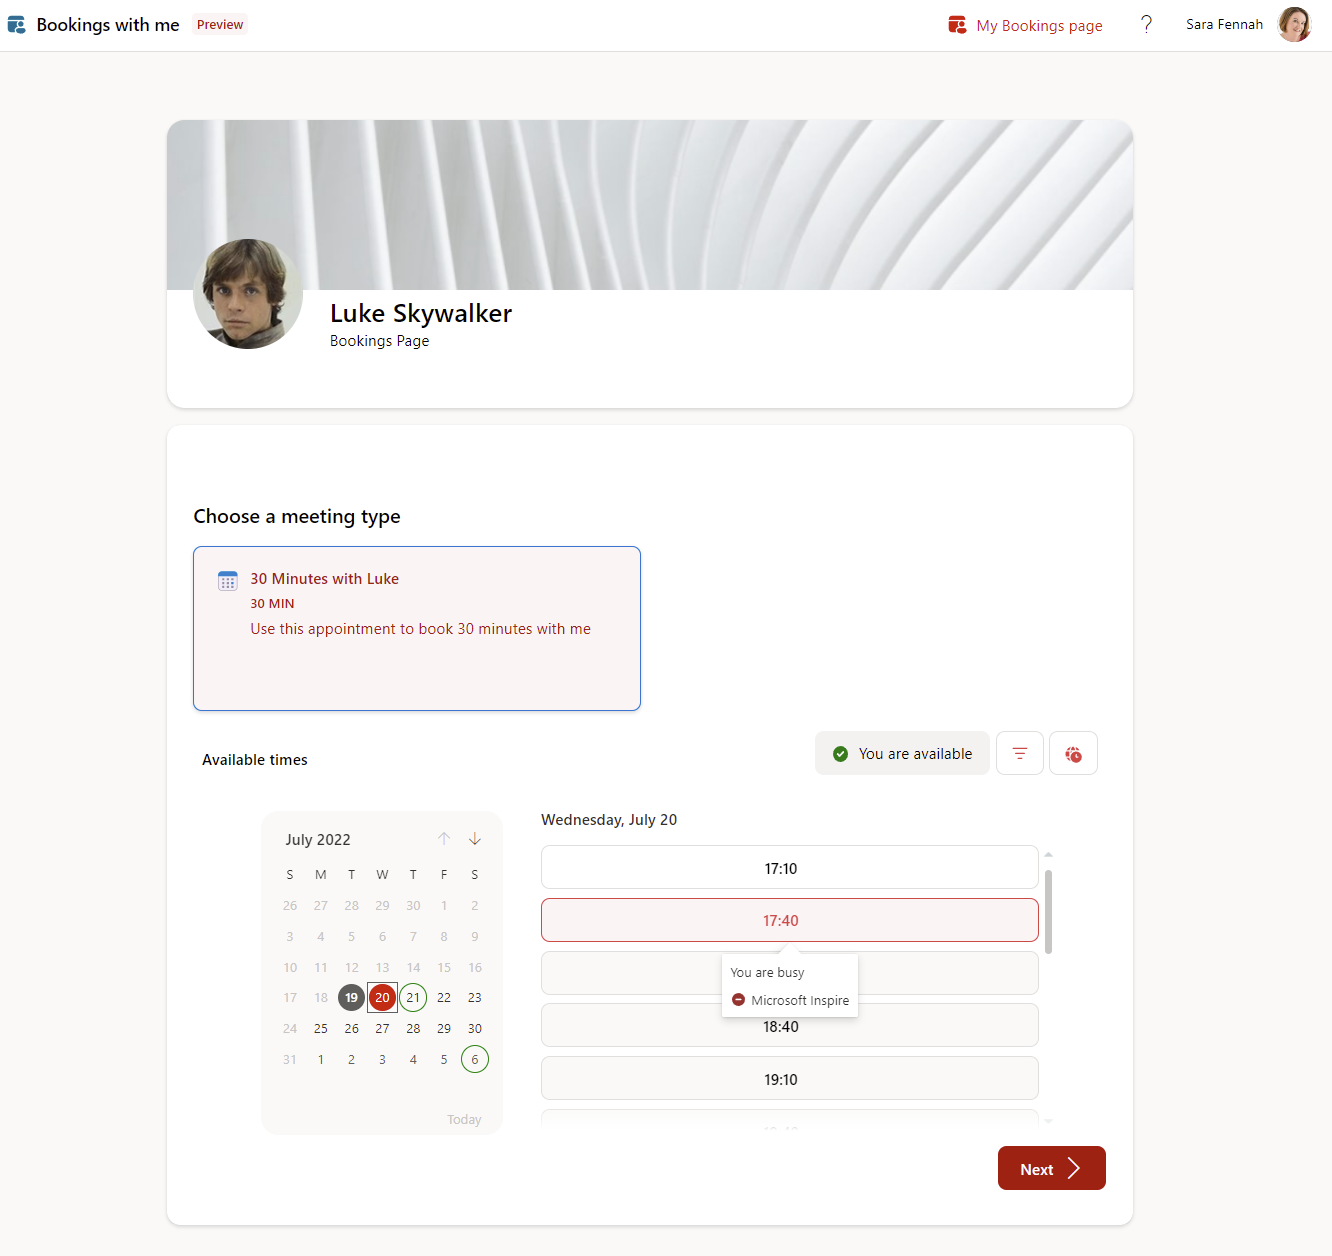
After choosing Continue as guest you will be able to choose the meeting type. Here there is only one meeting type available so it is already selected and a calendar displayed to see available times. On the calendar control dates with no available slots show greyed out, today’s date is highlighted with a circle and selected date highlighted with a square.
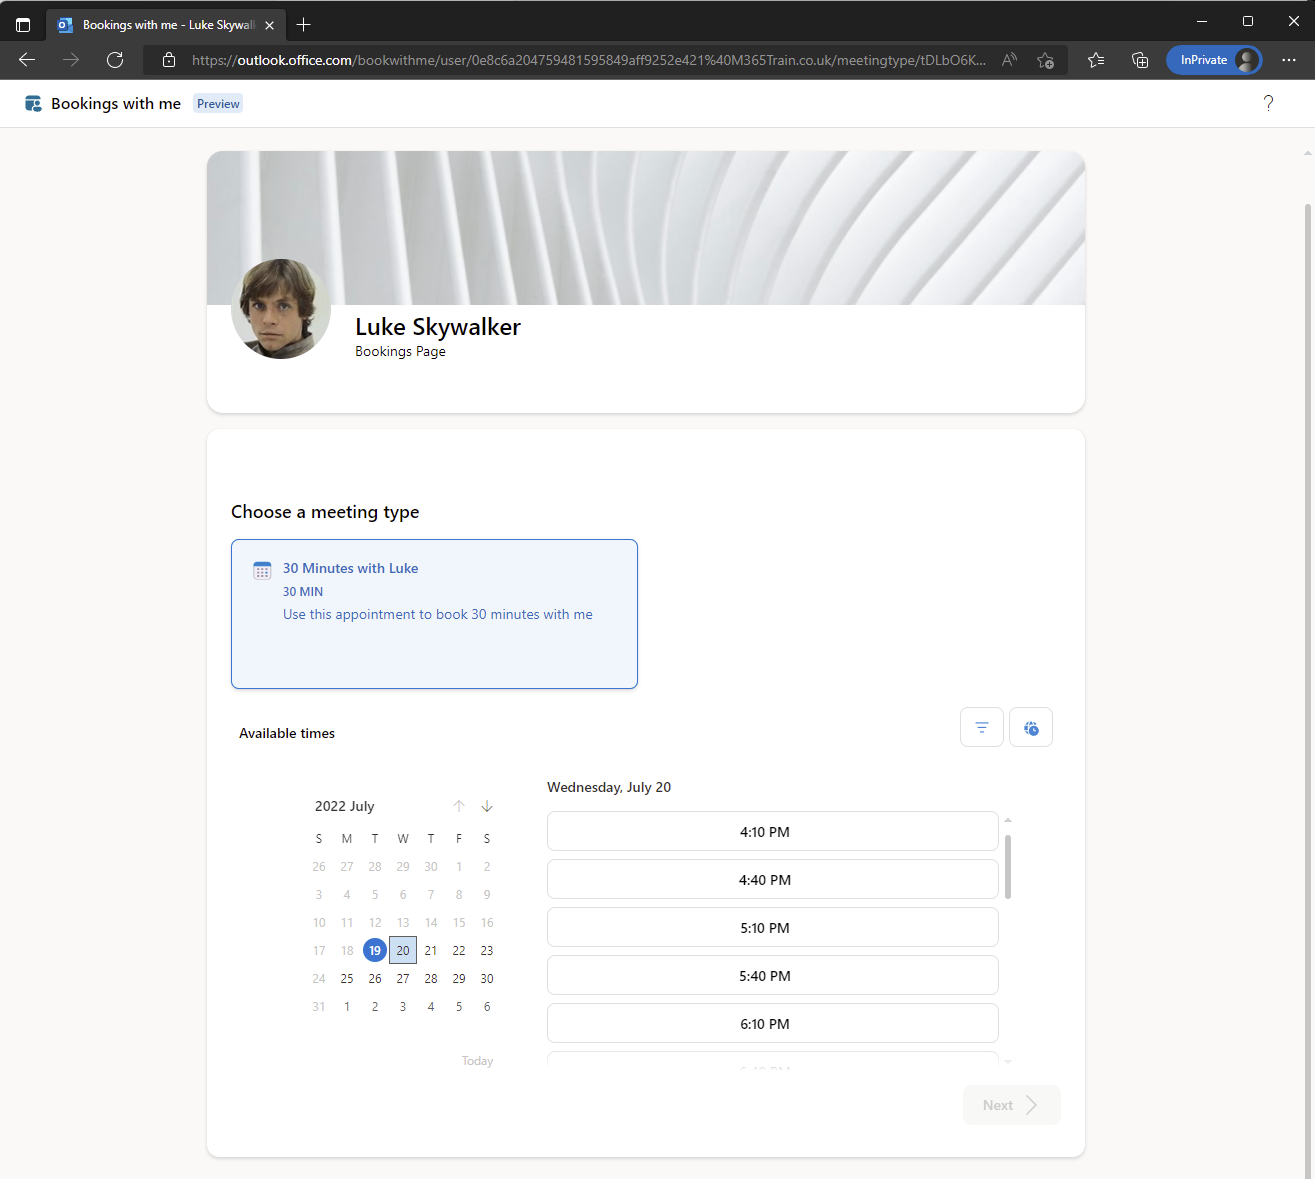
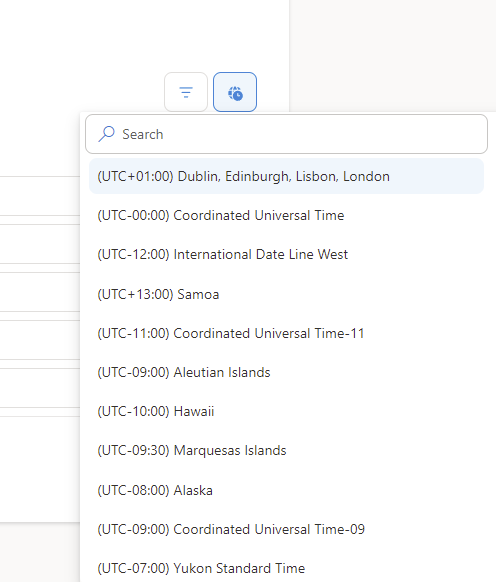
The times will be in the timezone of the person you are booking a meeting with. To verify or select your own timezone, be sure to use the globe icon to pick a timezone.
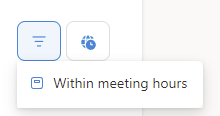
The three line funnel icon is designed to allow you to filter the times to your meeting hours. However as a guest we have not set our meeting hours so this does not change the times shown.
Once you have selected a date and time, click the Next button
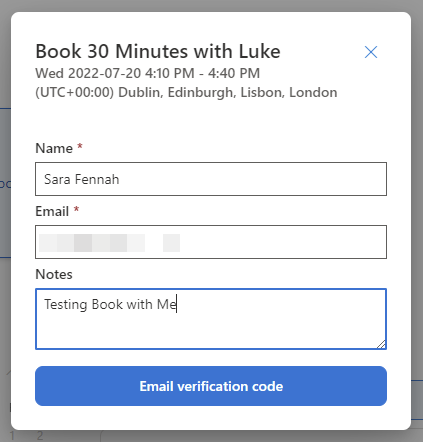
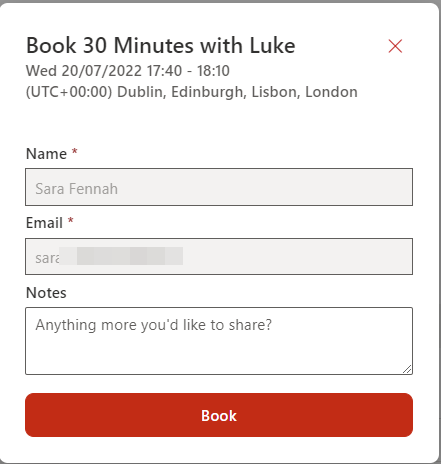
Fill in your name, email and any notes to let the person you are booking a meeting with, know what the meeting is about. To make your booking you will need to confirm your email address so click the Email verification code button to proceed.
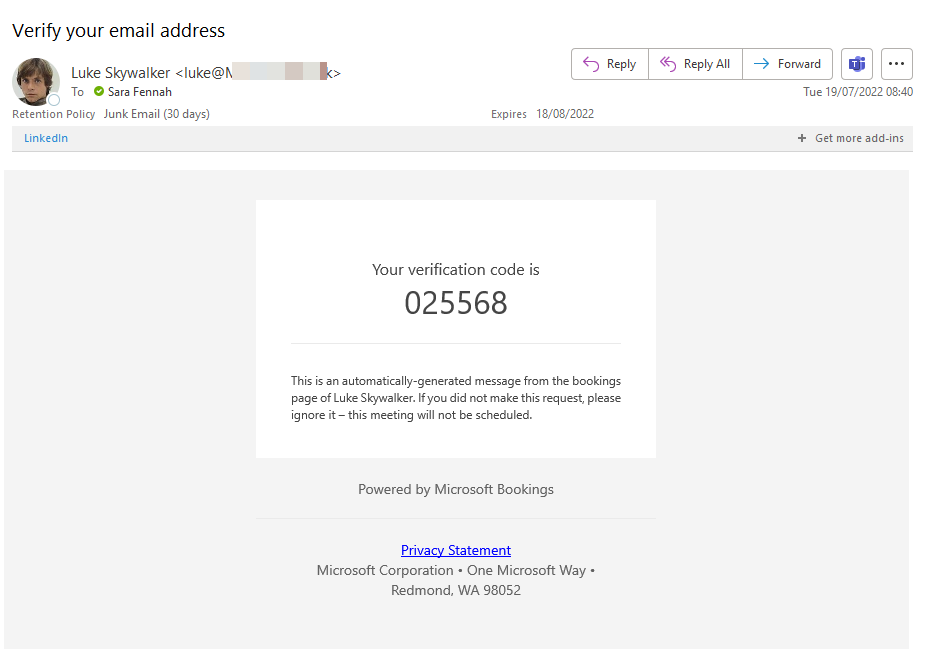
A screen to enter the verification code will be displayed

Check your email for the verification code
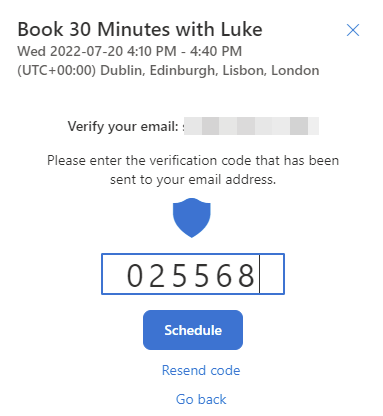
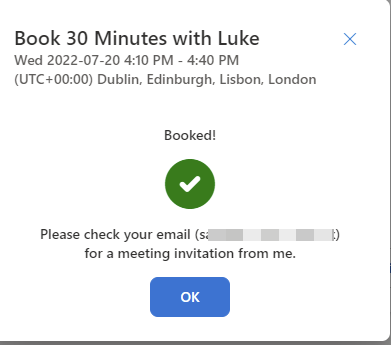
Enter the code into the bookings page and click the Schedule button. If you do not received the code, check your junk email or use the Resend code option on the bookings verify email page to generate a new email.
Once the code has been accepted you will see a confirmation message. Click the OK button to complete the process.
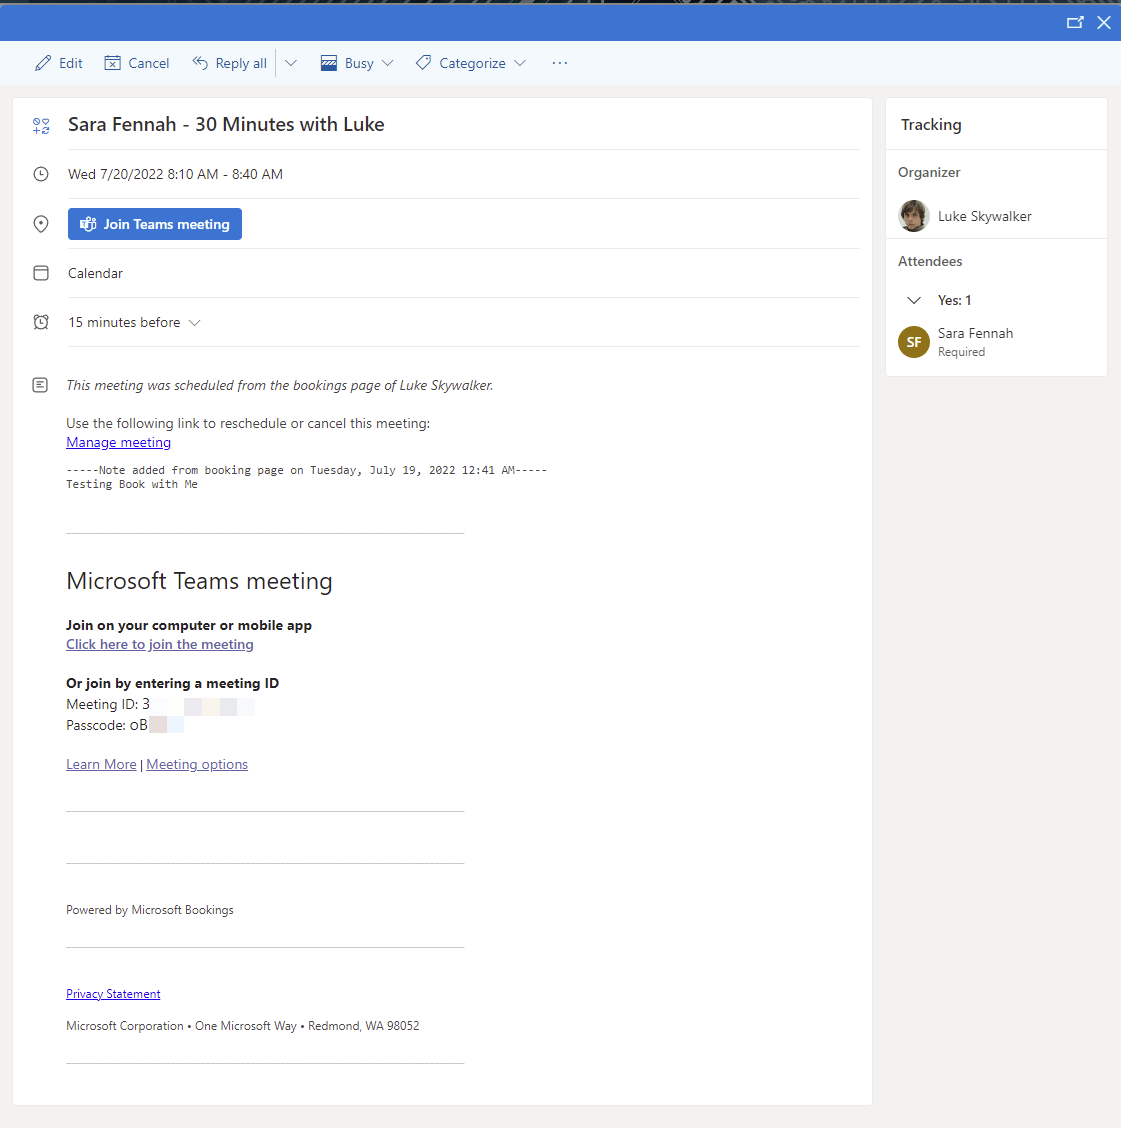
The meeting management page will be displayed, which also includes buttons to Reschedule the meeting, Cancel meeting or book a New meeting with the same person.
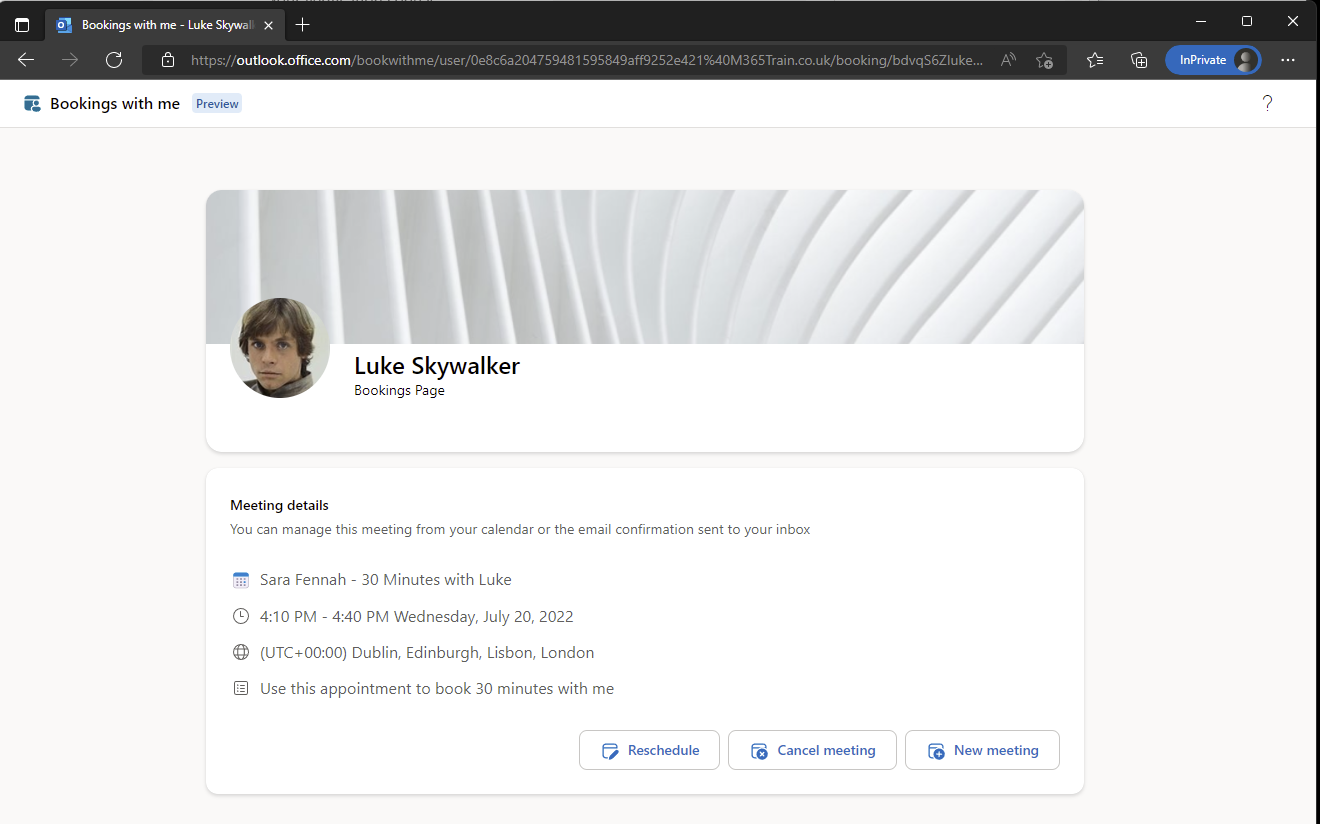
You will also have received a meeting invitation which includes a link to Manage meeting that will take you back to the meeting management page.
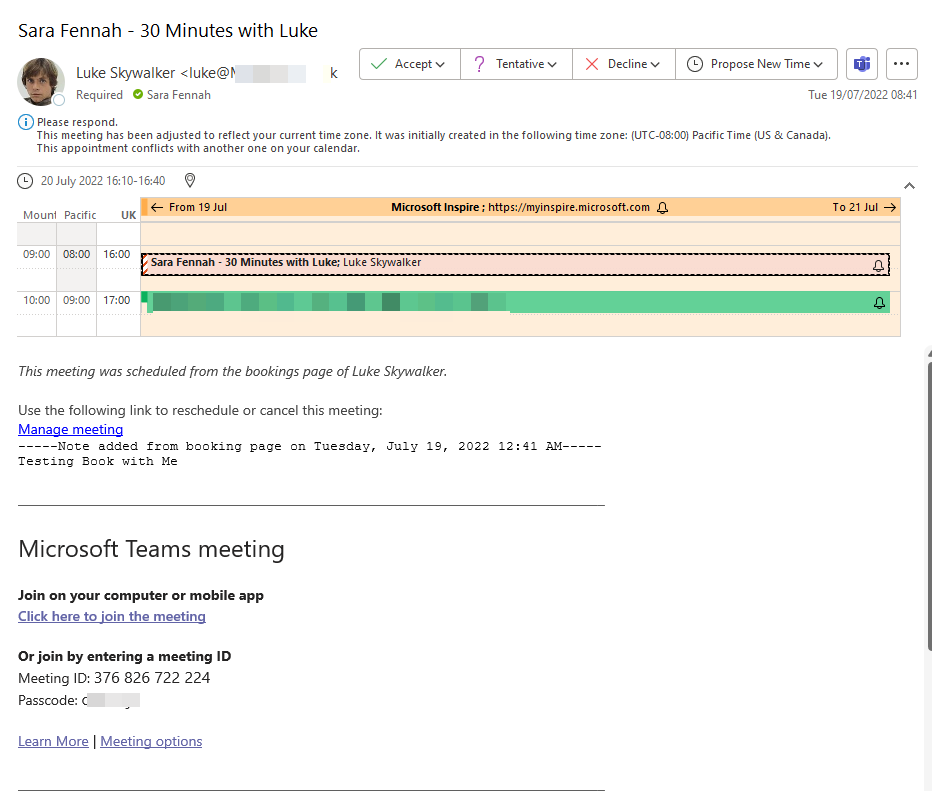
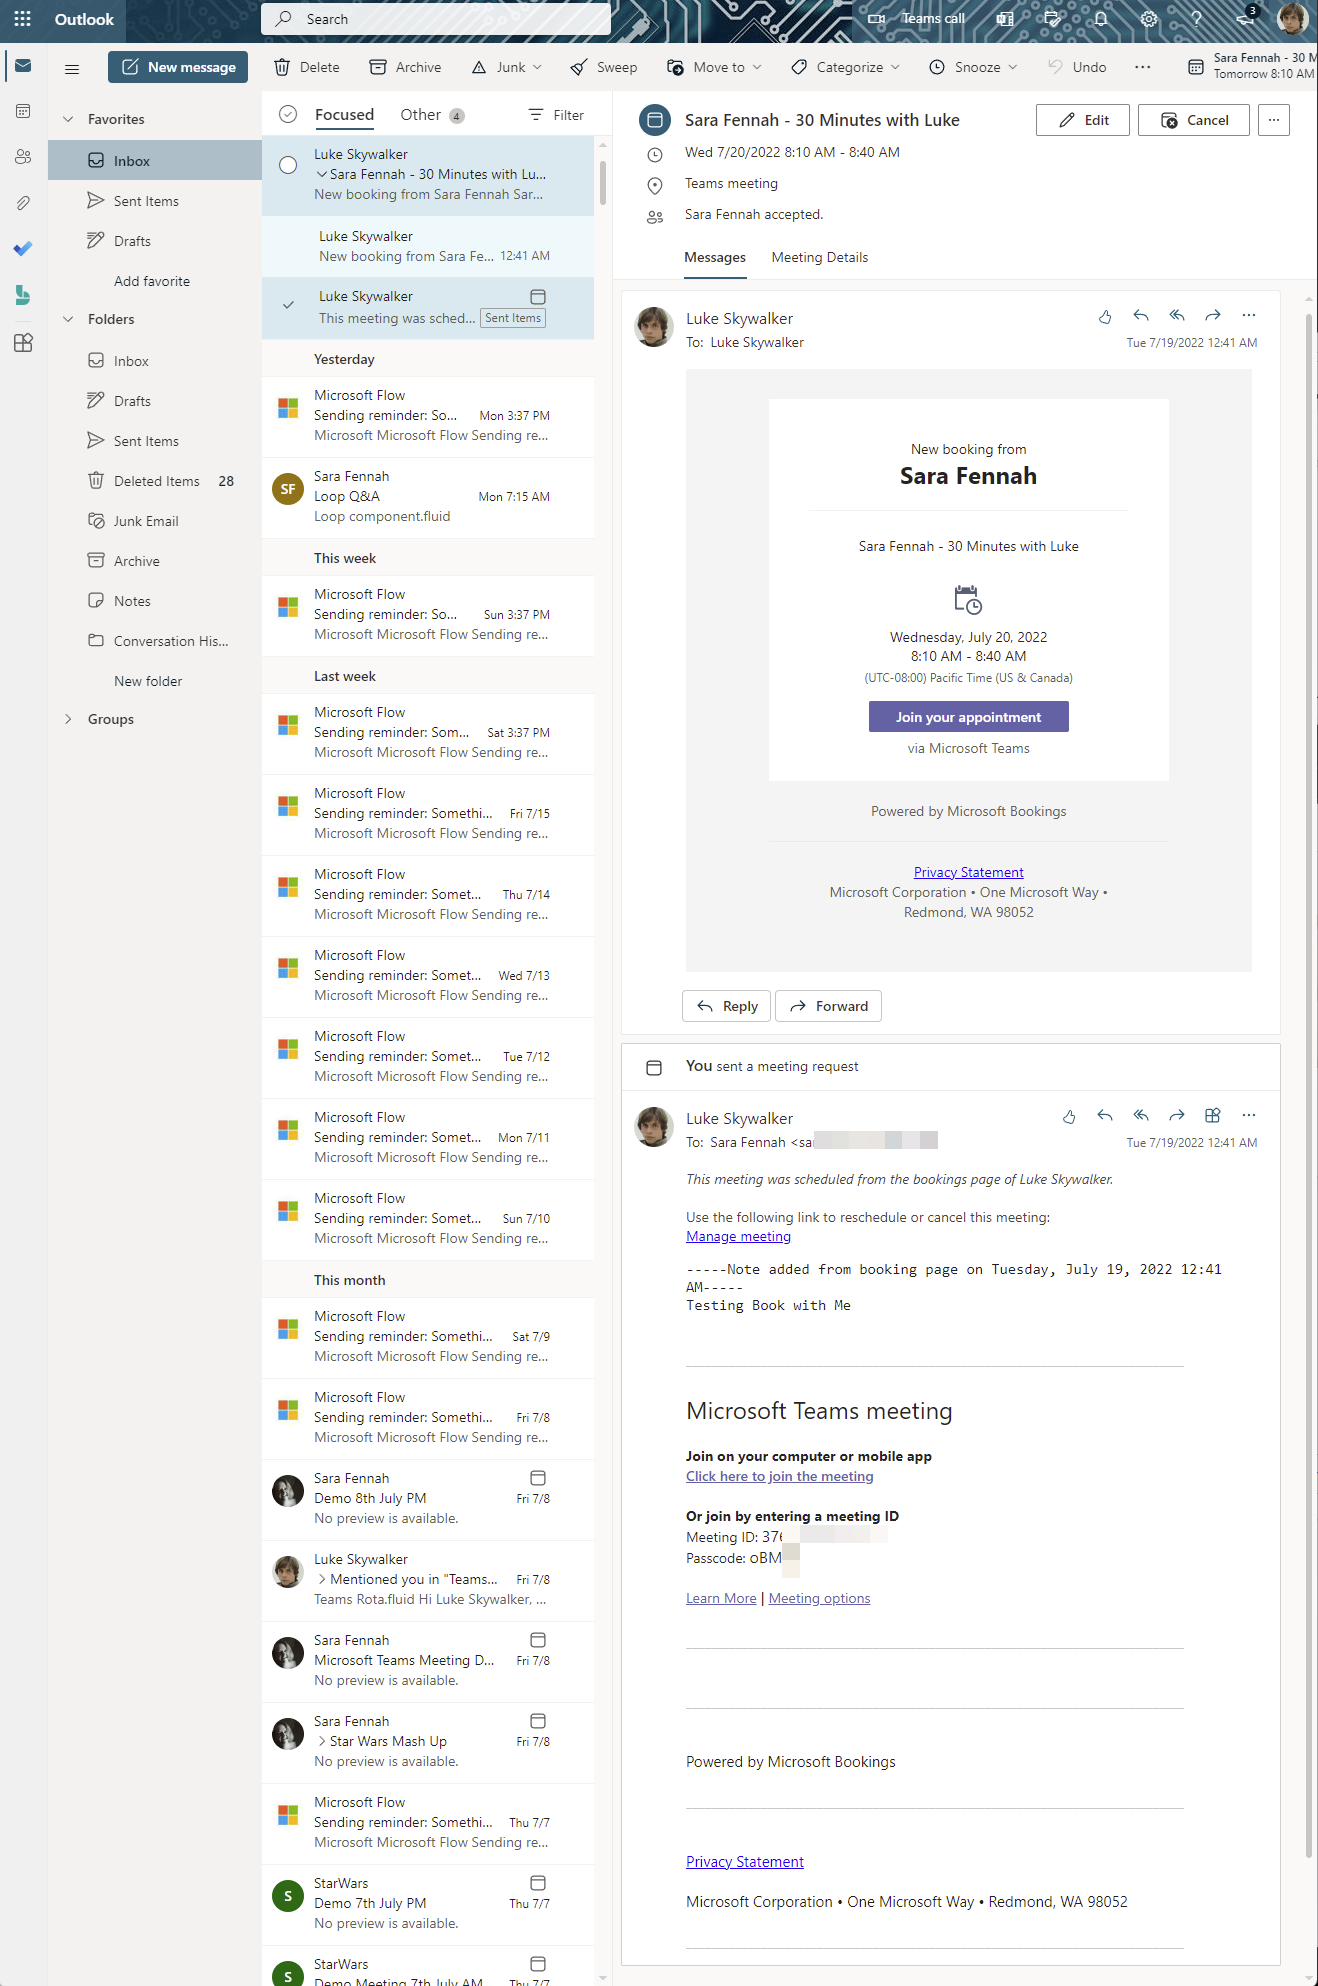
The person you booked the meeting with has also received an email notification of the meeting booking and a meeting invite which has been automatically accepted in their calendar.
Whilst their meeting invite also induces the Manage meeting link, this link only works for the person who booked the meeting.
As the meeting booker if, I select the Reschedule option from the manage meeting page then I am presented with the calendar selector to pick a different date and/or time. To change the meeting select the new dates/time and click Update button. The meeting invite will be updated for both parties.

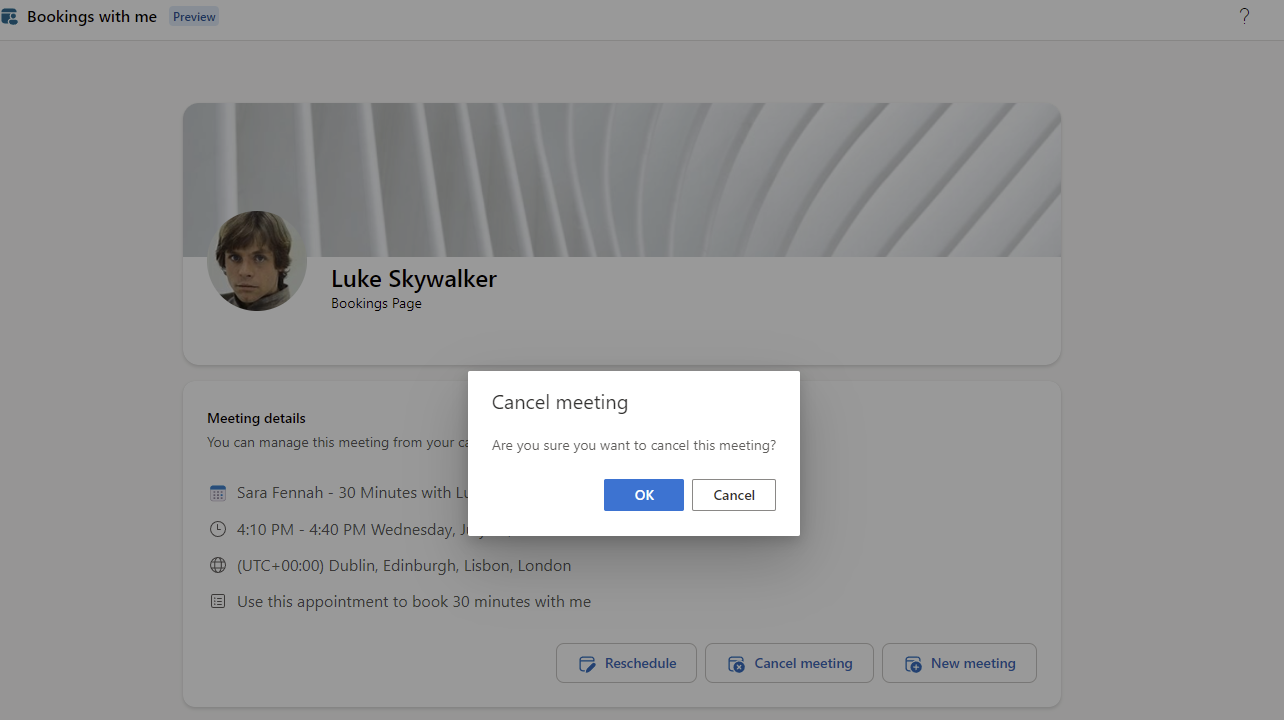
As the meeting booker if, I select the Cancel meeting option from the manage meeting page then I am presented with a confirmation box. Choose OK to confirm you wish to cancel the meeting
If you are a Microsoft 365 user and sign in when making a booking using someone else’s booking link then the date selection calendar let’s, you see your own availability alongside the available booking slots.
This will confirm if you are also available for your chosen slot.

The other difference, is that your name and email are automatically completed and there is no need to confirm your email with the pin verification process. So it’s much easier to sign in to book an appointment when offered a book with me link.
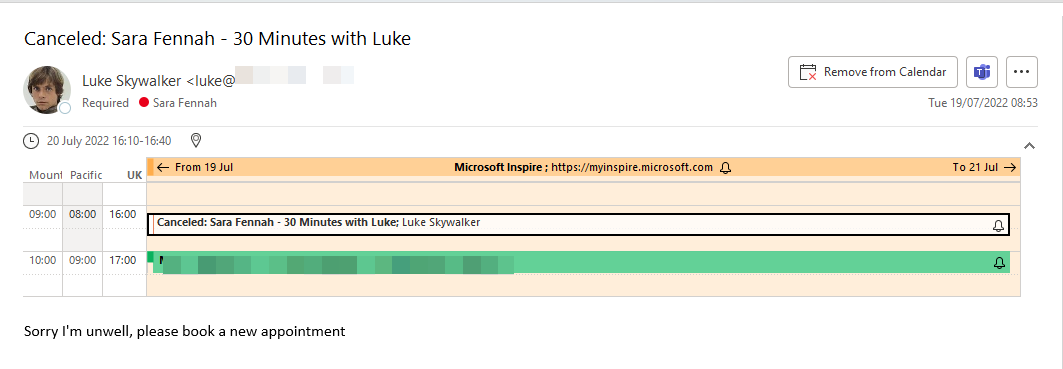
With personal bookings, the person offering the meeting bookings is the organiser. This means that as the meeting organiser, you can cancel or reschedule from your normal calendar, as with any meeting you set up.
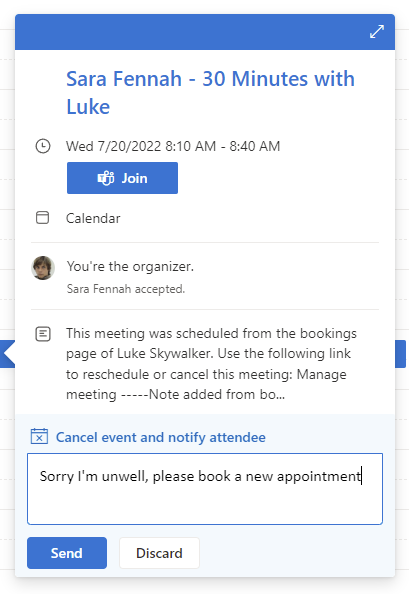
The person who booked the slot, will receive and updated meeting invite, including any message you sent on.

One thought on “Getting Started with Personal Bookings”