Quick parts in Word 2010 incorporates:
- Auto text entries
- Document properties fields
- Standard word fields
-
Templates for headers, footers, cover pages, tables of contents and more within Word
These components can be incorporated into any document to speed up document creation and formatting.
Headers and Footer
Headers and footers with standard information have long been part of Excel and Word 2010 also has similar templates. To use a built-in header or footer:
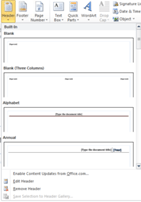
- From the Insert tab, select Header or Footer
- Choose the desired style
- You will automatically be editing the Header or Footer selected
-
Make changes as required then click Close on the Header/Footer Tools ribbon tab

NOTE: If you pick the option to Edit Header or Edit Footer you can still create your own header or footer. The options to insert date/time, picture and document details are still available from the Header/Footer Tools ribbon tab.
Quick Parts
Quick parts are another item that can be inserted into your header or footer or, indeed, any part of the document. These include document properties and other fields or AutoText entries which you can create yourself.
To include a quick part in your document:
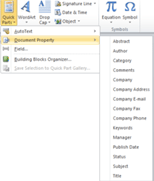
- From the Insert tab, select Quick Part
- Choose the desired category and item
-
You will now have a field in your document

AutoText Entries
AutoText entries can be used via the Quick Parts button or with auto correct. To use via the Quick Parts button:
- From the Insert tab, select Quick Part then AutoText
- Choose the item

- You will now have text in your document
To insert AutoText using auto correct:
- Start typing the name you gave the entry. If the name is unique across AutoText and auto correct you will be prompted to press enter to get the full entry. Press Enter on your keyboard and the text will appear.

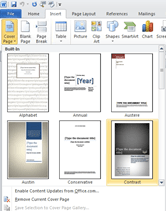
Cover Pages
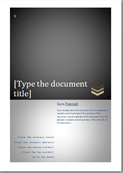
Cover pages are pre-defined single pages, which always go at the start of your document. They use quick parts, such as Document Title, author and subtitle.
Document Title is also used in many document header pre-sets.
The properties used by cover pages and other quick parts can be changed where they appear in the document. All others throughout the document will also be updated. Alternatively you can change this information in the Info section of the Backstage View.
To use a built-in cover page:
- From the Insert tab, select Cover Page
- Choose the desired style
- You will automatically be editing the cover page selected
- Make changes, as required then continue editing the document.
NOTE: Cover pages are always reformatted to match the theme or style set chosen for the document.
AutoText
Create AutoText
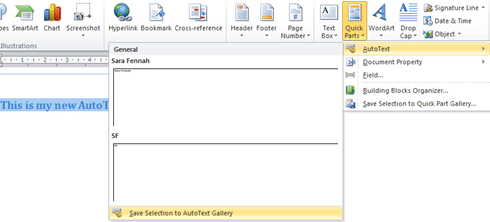
AutoText entries are formatted text which you can reuse in your documents. To create an AutoText entry:
- Locate or create the text that is to make up the AutoText entry and then select it
- Under the Quick Parts button (in the Text group on the Insert tab), select AutoText then Save Selection To AutoText Gallery
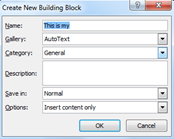
- In the Create
New Building Block dialog box enter a name and (if required) a category. Click OK

Amend AutoText
Once created AutoText entries cannot be edited, so to amend an entry you need to create it again, giving the entry the same name as before and thus overwrite the entry.
Delete AutoText
AutoText entries can be removed by:
- Under the Quick Parts button (in the Text group on the Insert tab), select Building Blocks Organizer
- Locate the entry you wish to remove & select it
- Click Delete and then confirm the deletion by clicking Yes
AutoCorrect
The main difference between AutoText and AutoCorrect is that AutoCorrect corrects automatically as you type. AutoText works by watching what you type and if you start typing one of your stored passages (or its name) it offers a tip on screen that you can choose to activate or just ignore.
Create an AutoCorrect Entry
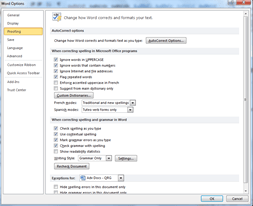
To create your own AutoCorrect entry:
- From the File menu select Options
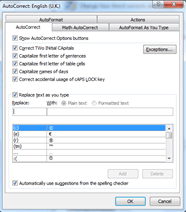
- In the Proofing group select AutoCorrect Options
- The AutoCorrect dialog box opens
- Enter the text you wish to type in the Replace box and text you want it replaced with in the With box, as shown below
- Click OK to confirm